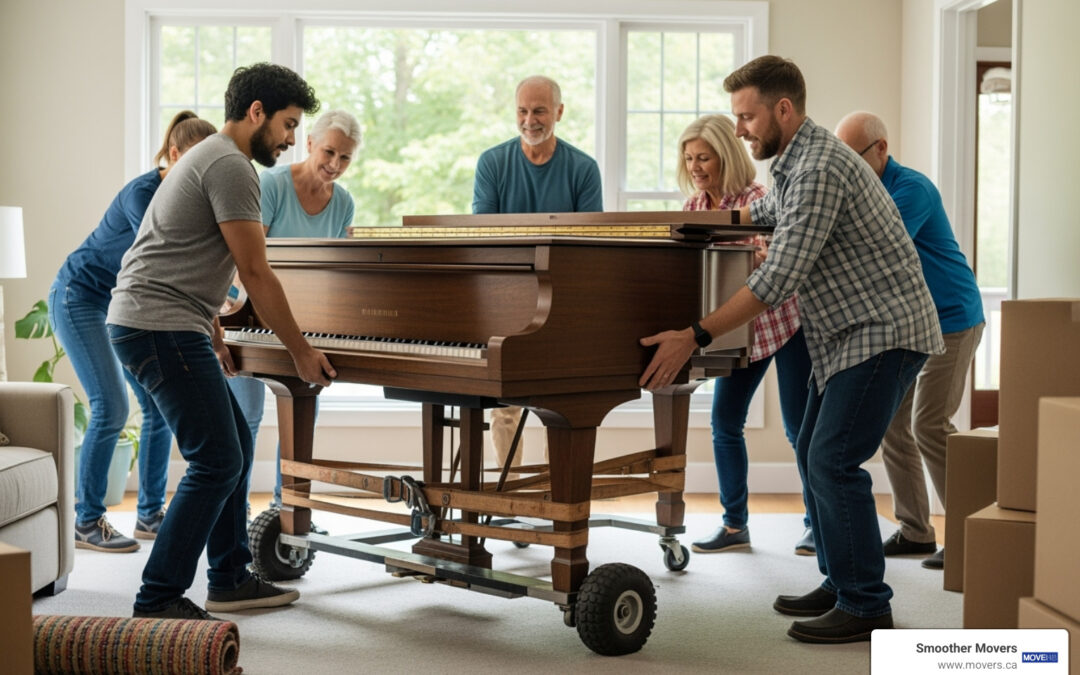
Why Moving a Piano Yourself Is Both Possible and Challenging
When you find yourself thinking, “I need to move a piano,” the thought can be daunting. These instruments are not just heavy; they’re delicate and often hold immense sentimental value. While a DIY move is possible, it’s a task that demands careful planning, the right equipment, and a lot of muscle.
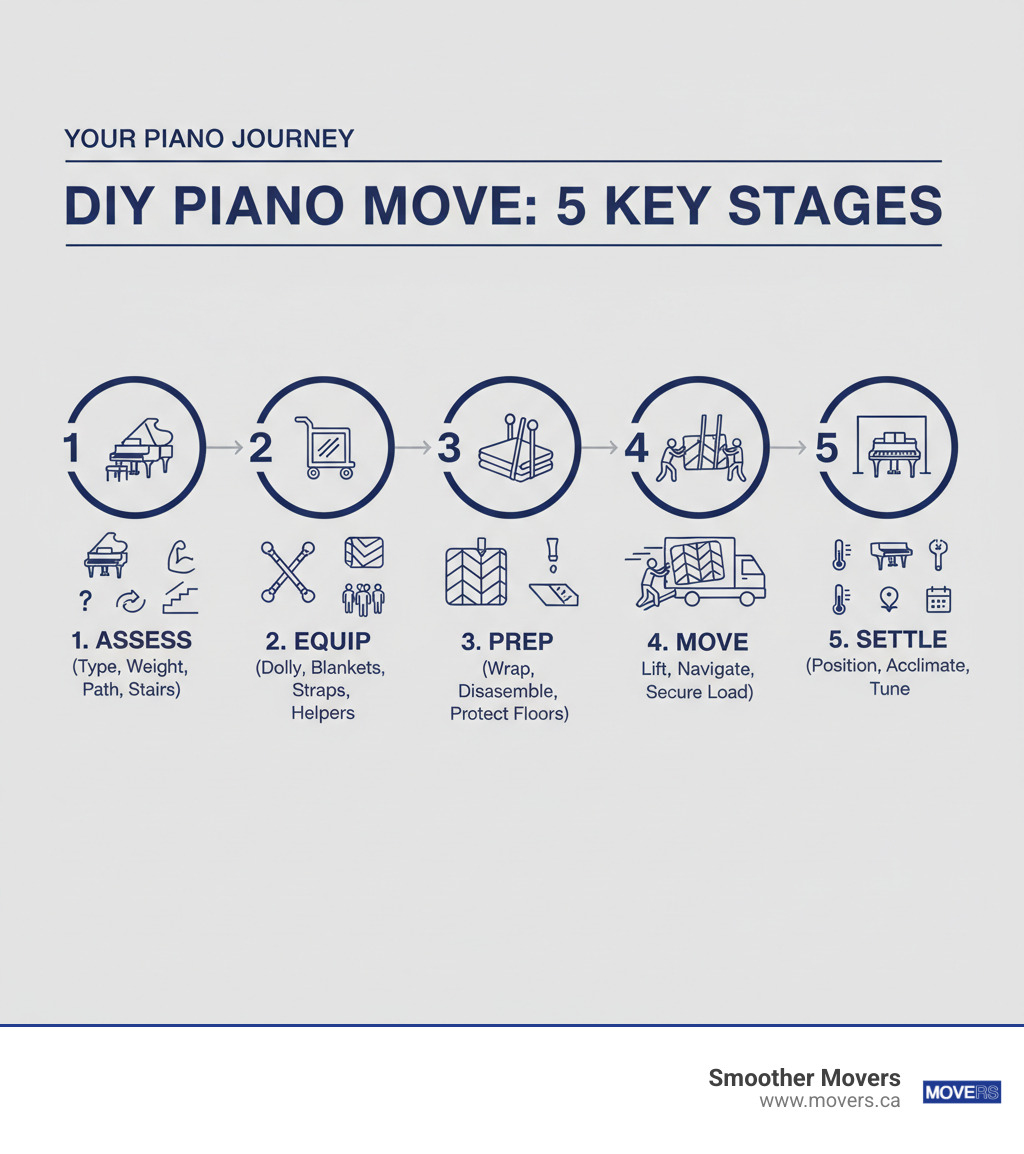
Quick DIY Piano Moving Checklist:
- Assess: Know your piano’s type, weight, and the entire path it will travel.
- Gather Gear: You’ll need a 4-wheel dolly, moving blankets, and strong straps.
- Recruit Help: Get at least 3-4 strong friends to assist.
- Prep & Protect: Wrap the piano securely. For grand pianos, this means disassembly.
- Move Safely: Use proper lifting techniques and secure it tightly in the truck.
- Know When to Call Pros: For stairs, tight corners, or valuable pianos, professional help is your safest bet.
Moving a piano yourself can seem like a way to save money, but the risks are significant. A small spinet piano can weigh over 300 pounds, while a concert grand can exceed 1,200 pounds. The intricate internal mechanics are sensitive to jarring and improper handling. A DIY move gone wrong can lead to costly damage to the piano, your home, or even serious personal injury.
I’m Douglas Bensley, and with over 40 years at Smoother Movers, I’ve seen it all. We’ve helped countless families across North Vancouver and the Lower Mainland move their cherished instruments. This guide will walk you through the process, helping you decide if a DIY move is right for you and how to do it as safely as possible.
First, A Reality Check: Should You Move Your Piano Yourself?
Before you start, it’s crucial to weigh the pros and cons. While saving money is tempting, the risks associated with moving a piano can be substantial. Let’s break down what you’re up against.
Piano Type and Weight
The first step is identifying your piano. The weight and size will determine the difficulty of the move.
- Spinet & Console Pianos: The smallest uprights, weighing 300-400+ lbs. They are the most manageable for a DIY move, but still require at least 3-4 people.
- Upright Pianos: Larger and heavier, ranging from 500-800+ lbs. Their height makes them awkward to maneuver.
- Grand Pianos: These are in a different league, weighing from 500 lbs for a baby grand to over 1,200 lbs for a concert grand. They require partial disassembly and are extremely difficult to move without professional experience.
The Path and Potential Obstacles
Measure everything! Your piano, doorways, hallways, and stairwells. A piano that won’t fit through a door is a common and costly oversight. Stairs are the biggest challenge. A single misstep can lead to disaster. As one expert noted, “You certainly don’t want your buddy crushed by your grand piano and your Grand piano destroyed as well.” If your move involves stairs or tight corners, we strongly recommend hiring professionals.

DIY vs. Professional: A Cost & Risk Comparison
While a DIY move seems cheaper, hidden costs and risks can add up. A professional move might cost between $800-$1,000, but it includes experienced movers, specialized equipment, and insurance. A DIY attempt gone wrong can result in thousands of dollars in damages, as one unfortunate story of “$11k piano damage and $10k wall damage” illustrates.
| Feature | DIY Piano Moving | Professional Piano Moving |
|---|---|---|
| Cost | Low initial cost (equipment rental, etc.), but high potential cost from damages. | Typically $800-$1,000, including experienced movers, specialized equipment, and insurance. |
| Equipment | Requires renting or buying a heavy-duty dolly, straps, and blankets. | Movers come with specialized gear like piano skids, custom dollies, and protective materials. |
| Risk of Damage | High. Scratches, dents, and internal damage are common without experience. | Low. Professionals are trained and insured against damage to the piano and your property. |
| Time & Effort | Significant. Requires planning, gathering help, and a full day of hard physical labor. | Minimal for you. The team handles everything, usually in a few hours. |
| Safety | High risk of personal injury (back strain, crushed fingers/toes). | Trained crews use safe techniques, minimizing risk. |
Gearing Up: The Essential Equipment for a DIY Piano Move
If you’ve weighed the risks and are committed to moving your piano yourself, having the right equipment is non-negotiable. This isn’t a job for brute force alone; it’s about having the right tools to move the weight safely and efficiently.
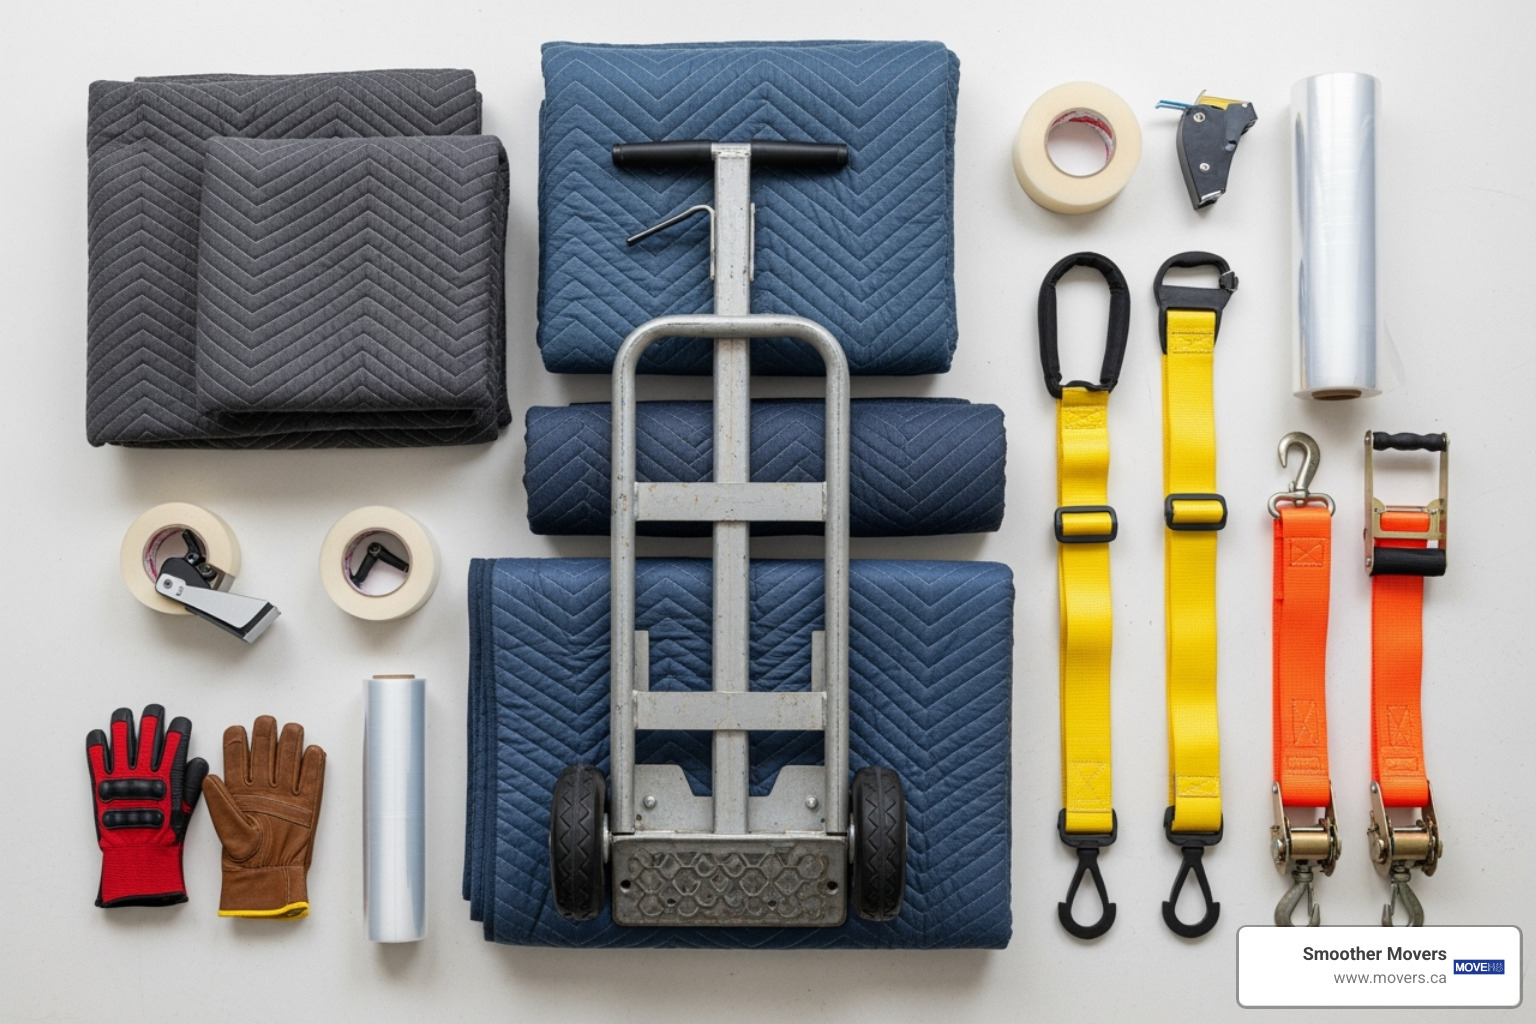
Your Essential Piano Moving Toolkit:
- Heavy-Duty 4-Wheel Dolly: This is your most important tool. Do not use a standard 2-wheel hand truck. You need a sturdy, flat, 4-wheel dolly (often called a piano or furniture dolly) that can handle the immense, concentrated weight.
- Moving Blankets: You can’t have too many. These thick, padded blankets are your first line of defense against scratches, dents, and dings. Wrap the entire piano, paying special attention to corners and legs.
- Lifting Straps (Shoulder Dolly): These straps use leverage to make lifting heavy, awkward items more manageable. They distribute the weight across your shoulders and torso, taking the strain off your back.
- Ratchet Straps: You’ll need several of these to secure the piano to the dolly and then to the inside of the moving truck. This prevents any shifting during transport, which is a primary cause of damage.
- Packing Tape & Stretch Wrap: Use tape to secure the blankets to themselves (never directly on the piano’s finish). Stretch wrap is excellent for holding everything tightly together and adding another layer of protection.
- Work Gloves: A good pair of grip-enhancing gloves is essential for protecting your hands and ensuring a secure hold.
- Basic Toolkit: If you’re moving a grand piano, you’ll need screwdrivers and wrenches to remove the legs and pedal lyre.
- Truck with a Ramp: Rent a truck that has a sturdy, built-in loading ramp. Trying to lift a piano from the ground to the truck bed is extremely dangerous.
Don’t have this specialized equipment? For those in the Lower Mainland, it’s often more practical to hire professionals who come fully equipped. Learn more about our Piano Moving services.
The Step-by-Step Guide to Moving Your Piano
Ready to get started? Follow these steps carefully. The key is preparation and communication with your team.
1. Prepare for the Move
- Measure Everything: Measure the piano’s dimensions and every doorway, hallway, and corner on its path. Ensure you have clearance.
- Clear the Path: Remove all furniture, rugs, and obstacles from the starting point to the moving truck.
- Protect Your Home: Lay down floor protection like cardboard or old blankets. Pad sharp corners and door frames.
- Assign a Leader: One person should be in charge of giving clear, simple commands to keep everyone in sync.
2. Prep the Piano
- Upright Pianos: Close and lock the keyboard lid. Wrap the entire piano in multiple layers of moving blankets, securing them with packing tape and/or stretch wrap. Do not apply tape directly to the wood finish.
- Grand Pianos: This is a complex process. You’ll need to carefully remove the music rack, pedal lyre, and legs. Wrap each piece individually in blankets. The main body of the piano is then carefully tipped onto its side on a special piano skid board and wrapped securely. This is a high-risk step, and we strongly recommend professional help for any grand piano. For more details, see our Tips for Grand Piano Disassembly.
3. Move and Load
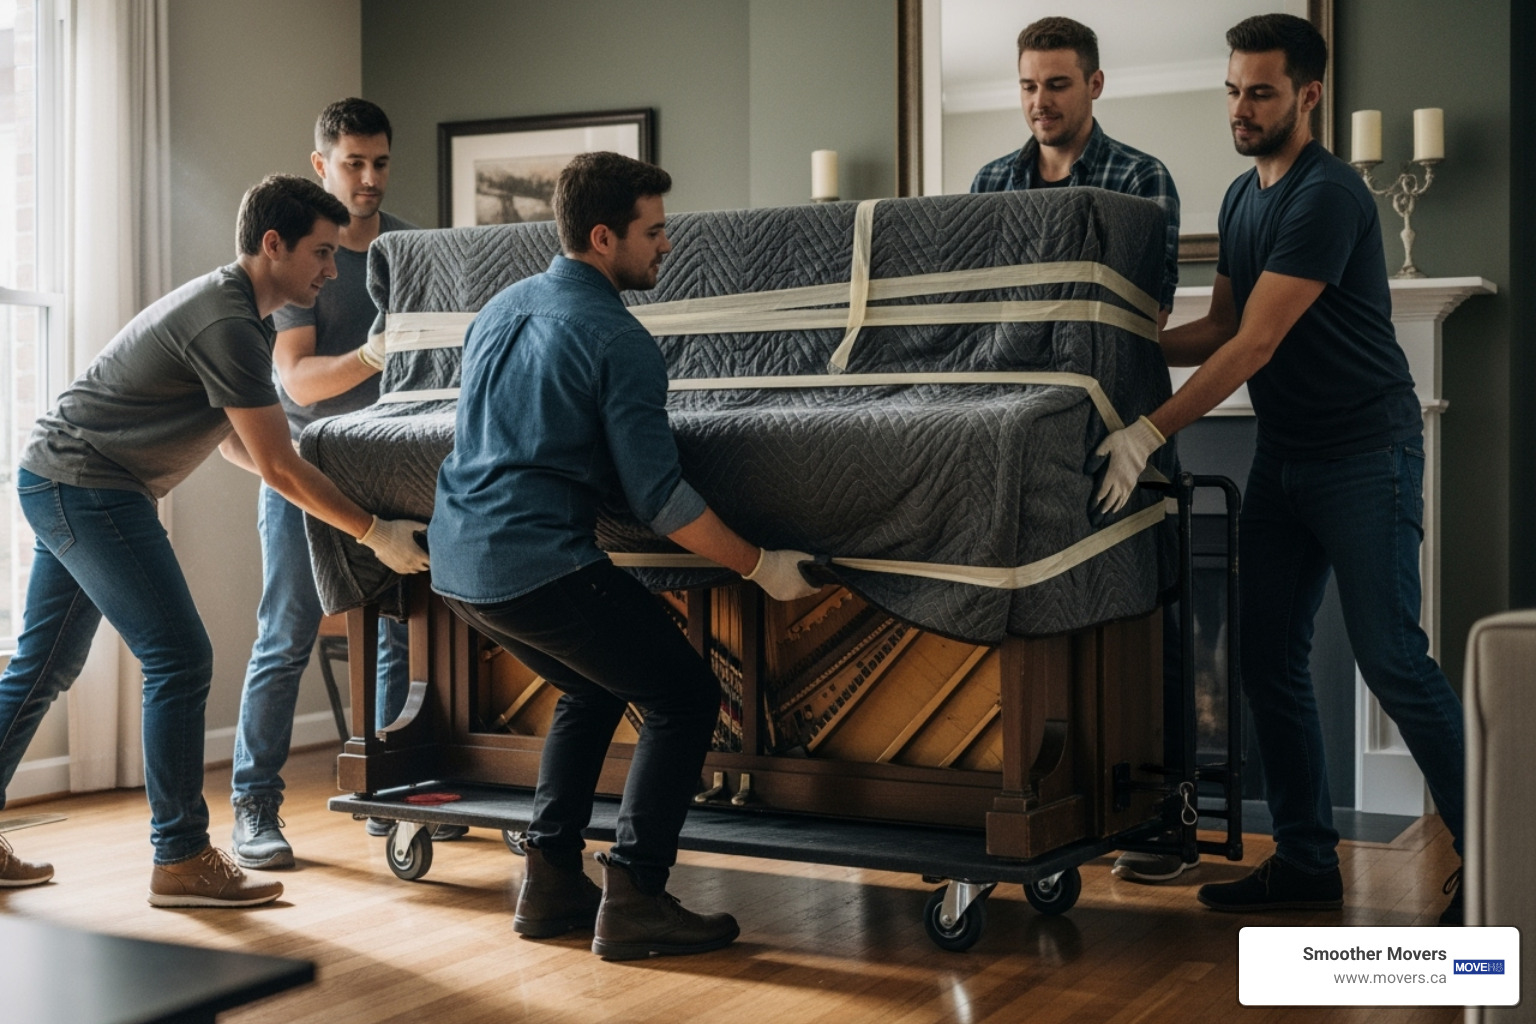
- Lifting: Always lift with your legs, not your back. Use lifting straps to help manage the weight. With your team, carefully lift the piano onto the 4-wheel dolly.
- Rolling: Push the piano slowly and steadily. Have spotters at the front and back to guide it and watch for obstacles.
- Loading: Use a truck with a sturdy ramp. Have at least two people in the truck to pull and guide, while two people push from behind. Never stand directly downhill from the piano.
- Securing: Position the piano against the front wall of the truck (the wall closest to the cab). Use ratchet straps to secure it tightly to the truck’s anchor points. It should not be able to shift at all during transit. For more tips, see our guide on Moving a Piano.
I Need to Move a Piano: Tackling Stairs and Other Obstacles
Moving a piano on a flat surface is one thing; adding stairs to the equation lifts the risk exponentially. This is the point where most DIY moves go wrong.
The Challenge of Stairs and Tight Spaces
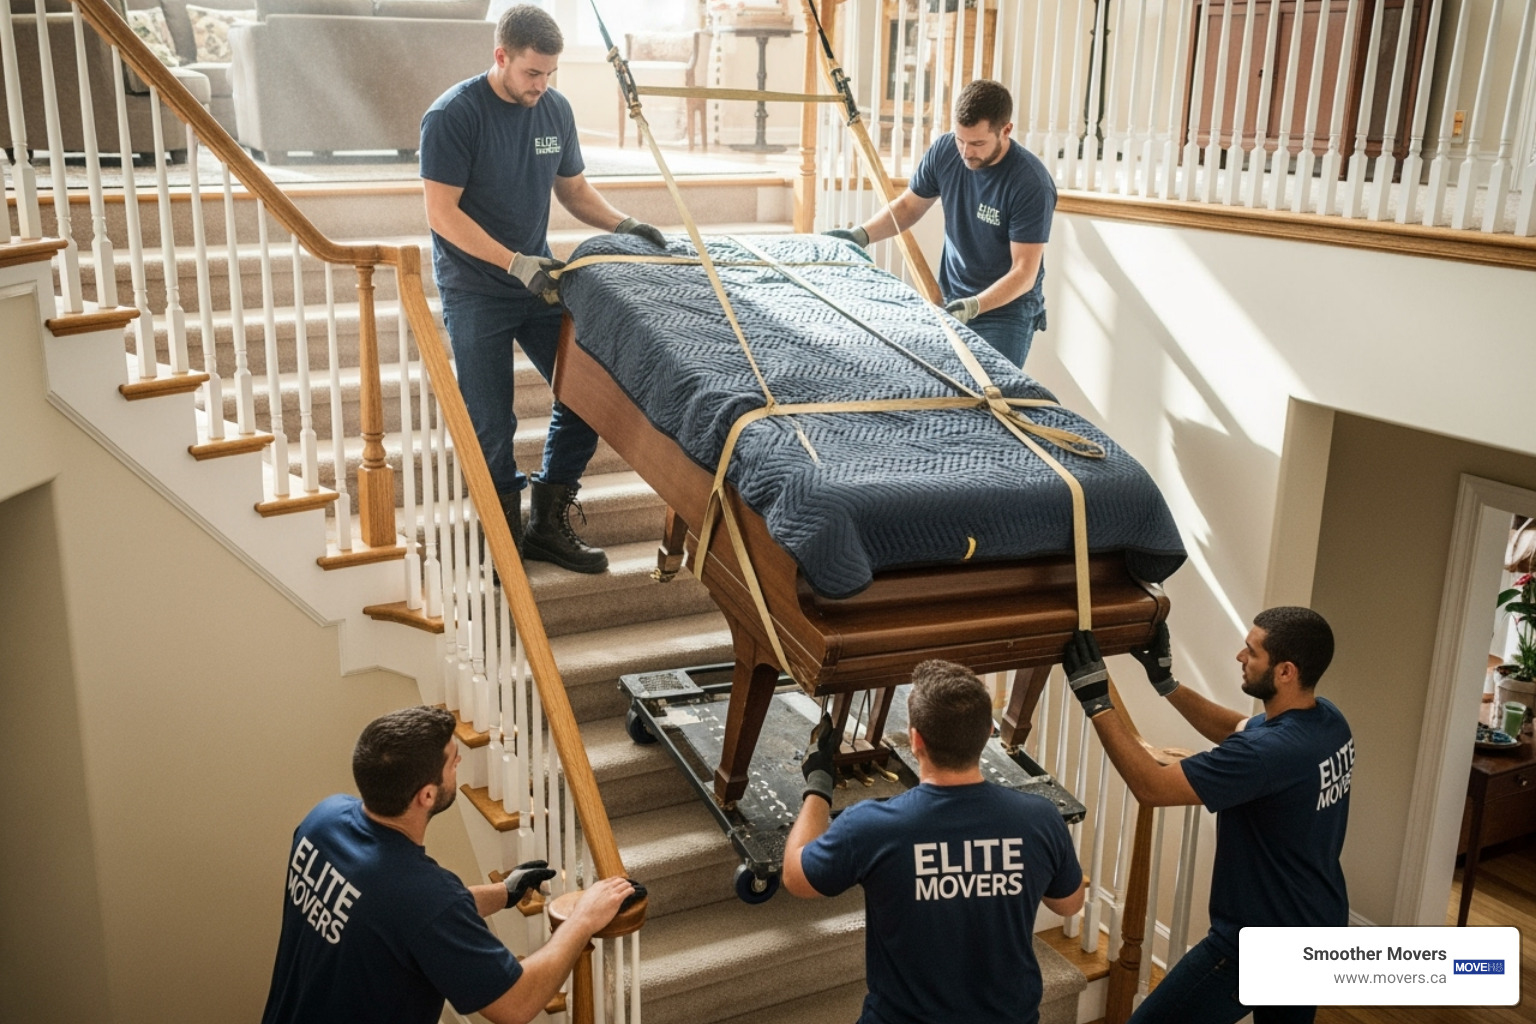
Stairs and tight corners are the biggest problems. The piano’s weight becomes much harder to control on an incline, and its awkward shape makes navigating turns a puzzle. One wrong move can result in a runaway piano, causing severe damage to the instrument, your home, and, most importantly, your helpers.
How to Approach Stairs (With Extreme Caution)
If you absolutely must move a piano up or down stairs, proceed with extreme care:
- Use More People: You’ll need at least 4-6 strong individuals. Two people should be below the piano to bear the weight, and two above to guide and pull.
- Go Slow: Move one step at a time. The person in charge should call out every move clearly.
- Use Straps: Lifting straps are essential to give you a secure grip and leverage.
- Protect Surfaces: Pad the stairs and railings to prevent damage.
For tight corners, you may need to remove doors from their hinges. In some cases, an upright piano can be carefully tilted on its side to steer a tight spot, but this is a high-risk maneuver.
Key Safety Precautions
- Wear proper footwear: Closed-toe shoes with good grip are a must.
- Use gloves: Protect your hands and improve your grip.
- Lift with your legs: Keep your back straight to avoid serious injury.
- Never rush: A slow, steady pace is the safest way to move a piano.
After the Move: Post-Relocation Piano Care
Congratulations, the heavy lifting is over! But the job isn’t quite finished. Proper care after the move is crucial for your piano’s health and longevity.
1. Find the Right Spot:
Where you place your piano matters. Keep it away from direct sunlight, heating vents, and drafty windows. Extreme or fluctuating temperatures and humidity can damage the wood and affect the tuning. An interior wall is usually the best location.
2. Let It Acclimate:
A piano needs time to adjust to its new environment. The wood, strings, and soundboard will expand or contract based on the new temperature and humidity. Allow it to settle for at least 2-4 weeks before having it tuned. Playing it during this time is fine, but it may not sound its best.
3. Schedule a Professional Tuning:
Every piano needs to be tuned after a move. The journey, no matter how smooth, will affect its delicate internal mechanisms. Once the piano has acclimated, call a professional piano technician. You can find a registered technician in your area through resources like the Piano Technicians Guild. A proper tuning will bring its beautiful voice back to life.
If you’re in the middle of a renovation or need to store your instrument, consider our professional Piano Storage Solutions in Vancouver and BC to keep it in a safe, climate-controlled environment.
Frequently Asked Questions about Moving a Piano
When you’re thinking, “I need to move a piano,” a lot of questions come to mind. Here are the answers to the most common ones.
How much does a piano weigh?
More than you think! The weight varies by type:
- Spinet & Console Pianos: 300-400+ lbs (136-181+ kg)
- Upright Pianos: 500-800+ lbs (227-363+ kg)
- Grand Pianos: 600-1,200+ lbs (272-544+ kg)
How many people does it take to move a piano?
For a standard upright piano on a flat surface, you need a minimum of four strong people. For a grand piano or any move involving stairs, you’ll need at least five to six people with a clear plan and a designated leader.
Do I have to tune my piano after moving it?
Yes, absolutely. The physical movement and change in environment will almost certainly knock it out of tune. Let the piano acclimate to its new home for 2-4 weeks, then call a professional piano tuner to get it sounding perfect again.
Conclusion: The Final Note on DIY Piano Moving
Moving a piano is a significant undertaking. While it’s possible to do it yourself, the process is fraught with risks—from damaging a valuable and often sentimental instrument to causing serious personal injury. The weight, awkward shape, and delicate internal mechanics of a piano make it one of the most challenging items to move.
Before you decide to take on this task, carefully weigh the cost of renting equipment and the potential for expensive repairs against the price of hiring professionals. As we’ve seen, a DIY move can sometimes end up costing far more than a professional service, especially if your move involves stairs, tight corners, or a grand piano.
If you’re in North Vancouver or anywhere in the Lower Mainland and thinking, “I need to move a piano, but this sounds too risky,” we’re here to help. At Smoother Movers, we have over 40 years of experience moving pianos of all shapes and sizes. Our trained team has the right equipment and expertise to ensure your instrument arrives at its new home safely and soundly.
Don’t risk your back or your beautiful piano. For a safe, stress-free experience, contact us for a quote from our professional Piano Movers in BC. Let us handle the heavy lifting so you can focus on making music in your new home.
Frequently Asked Questions about Moving a Piano
When I need to move a piano, several common questions always come up. After four decades of helping families in North Vancouver and throughout BC with their piano moves, we’ve heard them all. Let me address the most important ones.
How much does a piano weigh?
This is usually the first question people ask, and the answer often surprises them. Pianos are deceptively heavy – much heavier than most people expect.
Spinet & Console Pianos are the lightest of the bunch, but even these “smaller” uprights typically weigh between 300-400+ pounds. That’s still the equivalent of two or three adults!
Upright Pianos are where things get serious. This category includes studio pianos, professional uprights, and full-size uprights. Most weigh between 500-800+ pounds, though some upright player pianos with their intricate internal mechanisms can tip the scales at over 900 pounds.
Grand Pianos are in a league of their own. A small grand piano (around 54 inches long) weighs 500-600 pounds, while larger grand pianos easily reach 1,000 pounds. Concert grand pianos and specialty instruments can even exceed 1,200 pounds.
To put this in perspective, the average piano weighs anywhere from a quarter to well over half a ton. It’s one of the heaviest single items you’ll ever attempt to move in your home.
How many people does it take to move a piano?
This is where many DIY attempts go wrong – people underestimate the manpower needed. For a safe upright piano move without stairs, you need a minimum of four strong individuals. This allows two people to safely lift and guide each end while properly distributing the weight.
But here’s the catch: if you’re dealing with a grand piano or any move involving stairs, you’ll likely need five to six helpers or more. The added complexity of disassembly, the sheer bulk of a grand piano, and the extreme difficulty of navigating stairs demand extra hands for both lifting and spotting.
It’s always better to have too many strong helpers than too few. One person getting tired or losing their grip can spell disaster for both your piano and everyone involved.
Do I have to tune my piano after moving it?
Yes, absolutely. This is one question where there’s no wiggle room. Moving a piano almost guarantees it will go out of tune, and here’s why.
A piano contains thousands of finely adjusted components, including strings under immense tension. The vibrations, bumps, and shifts in balance during transportation – no matter how careful you are – will inevitably cause the strings and internal mechanisms to settle differently.
But it’s not just the physical movement. Changes in humidity and temperature between your old and new locations (even within the same city like Vancouver or Burnaby) affect the wood and strings, causing them to expand or contract.
Here’s what you need to do: Allow your piano to acclimate to its new environment for 2-4 weeks after the move. This gives the wood and strings time to stabilize in the new humidity and temperature conditions. After this acclimation period, schedule an appointment with a professional piano tuner who can restore your cherished instrument to its proper sound.
It might seem like an extra expense after a stressful move, but proper tuning ensures all your hard work pays off with beautiful music once again.
Conclusion
Moving a piano yourself is like trying to choreograph a ballet with elephants – it’s technically possible, but requires incredible precision, strength, and a bit of courage. Throughout this guide, we’ve explored every aspect of what happens when I need to move a piano, from understanding the different piano types and their unique challenges to gathering the right equipment and executing a safe move.
The reality is clear: while a DIY piano move can save you money upfront, the risks are substantial. We’re talking about instruments that weigh anywhere from 300 to over 1,200 pounds, with thousands of delicate internal components that can be damaged by even minor bumps or shifts. The potential for personal injury – from strained backs to crushed limbs – is very real, especially when navigating stairs or tight corners.
The financial math often doesn’t add up either. While professional piano movers typically charge $800-$1,000, the cost of repairing a damaged piano or fixing property damage can easily exceed that amount. Remember the cautionary tale we mentioned earlier: $11,000 in piano damage and $10,000 in wall repairs from one failed DIY attempt. That’s a steep price to pay for trying to save a few hundred dollars.
If your move involves stairs, extremely tight spaces, or if your piano holds significant sentimental or monetary value, we strongly encourage you to reconsider the DIY approach. This is especially true for families in the Lower Mainland and throughout British Columbia, where many homes feature challenging layouts with narrow staircases, tight doorways, and multiple levels.
At Smoother Movers, we’ve been helping families safely relocate their cherished pianos for over 40 years. Our experienced team understands that your piano isn’t just a piece of furniture – it’s often a family heirloom, a source of joy, and sometimes a significant investment. We have the specialized equipment, trained crews, and insurance coverage to ensure your instrument arrives safely at its new home.
Whether you’re moving within North Vancouver, relocating to Vancouver, or anywhere else across British Columbia, our professional piano movers can handle the complexities while you focus on settling into your new space. For a stress-free experience when I need to move a piano, consider getting a quote from our professional Piano Movers in BC. Sometimes, the peace of mind that comes with professional expertise is worth every penny.

